
In the world of school projects and classroom presentations, creativity now matters as much as content. Whether you’re designing a science fair video, presenting a history report, or summarizing a literature project, basic slides just don’t cut it anymore. That’s where CapCut Desktop Video Editor and its AI-powered tools, such as AI Voice Generator, can transform the way you work on academic content, making your projects more engaging, informative, and unforgettable.
Why Use CapCut AI for School Projects?
Most school presentations still rely on boring slides or text-heavy PDFs. But when you use CapCut, you’re giving your teacher—and your classmates—a reason to pay attention. Here’s how CapCut AI can help:
-
AI Voiceovers: Turn written reports into narrated videos with lifelike voices, eliminating the need to record your audio. Ideal for shy presenters!
-
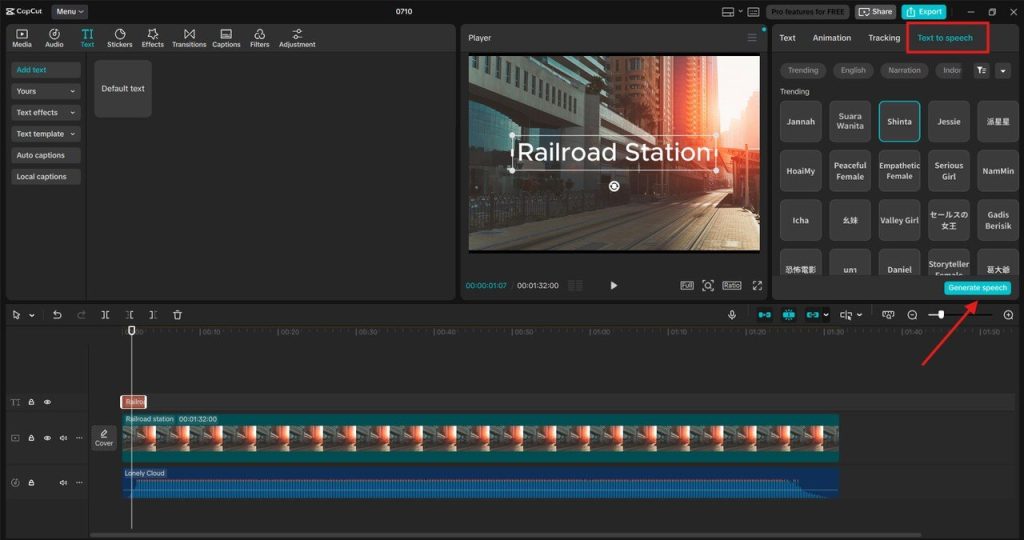
Text-to-Speech and Subtitles: Generate automatic voiceovers and captions from your scripts for better accessibility and comprehension by using Text to Speech AI.
-
Video Upscaling: Got blurry or low-quality footage? Use the AI Video Upscaler to enhance clarity and make clips look HD.
-
Templates and Auto Captions: Save time with ready-to-use presentation templates and automatically generated subtitles.
-
AI Tools Like Background Removal: Focus your visuals by removing distractions, trimming awkward pauses, and isolating key elements.
CapCut isn’t just for influencers—it’s a creative classroom asset that turns dull into dynamic.
How to Upgrade School Projects and Presentations Using CapCut PC
Step 1: Organize Your Content and Script Your Message
Before diving into CapCut, plan your project just like you would for any presentation. Outline key points from your topic—think of what you want to explain visually. Write a brief script for narration if you’re using AI voiceover features. Collect related images, short video clips, diagrams, or PowerPoint slides. If you’re working on a group project, assign different sections to each teammate. Keep each part of your script under 1 minute. CapCut works best when audio and visuals are broken into digestible chunks.
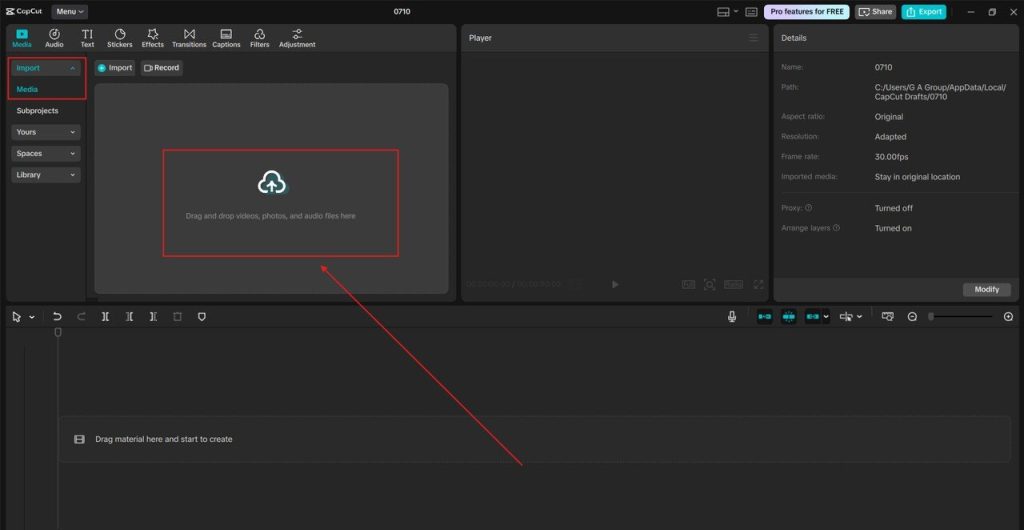
Step 2: Build Your Presentation Video in CapCut
Now comes the fun part—opening CapCut for Desktop and assembling your project. Import all your media, including photos, slides, diagrams, and videos. Use “Auto captions” to convert your script into on-screen captions. Select “Text to speech” to convert your written script into a clear voiceover. Select a voice style that aligns with the tone of your topic—whether friendly, serious, or even dramatic. Add AI-generated transitions to move smoothly between topics. Use cutouts or background removers to keep focus on you or your subject in video footage. Enhance your visuals with the AI Video Upscaler to sharpen old content, especially when incorporating archival or historical clips. Want to add a hook? Start your video with an animated title screen or dramatic intro using CapCut’s AI video templates.
Step 3: Polish and Export Your Final Project
Once your content is in place, polish everything to perfection. Trim awkward silences or stutters using CapCut’s Smart Cut. Sync voiceovers with visuals to ensure a natural flow. Add background music—CapCut offers copyright-free music that’s classroom-safe. Use filters and color correction to brighten up dark videos or images. Preview your final video in full-screen mode. Look for any spelling issues in captions and subtitles.
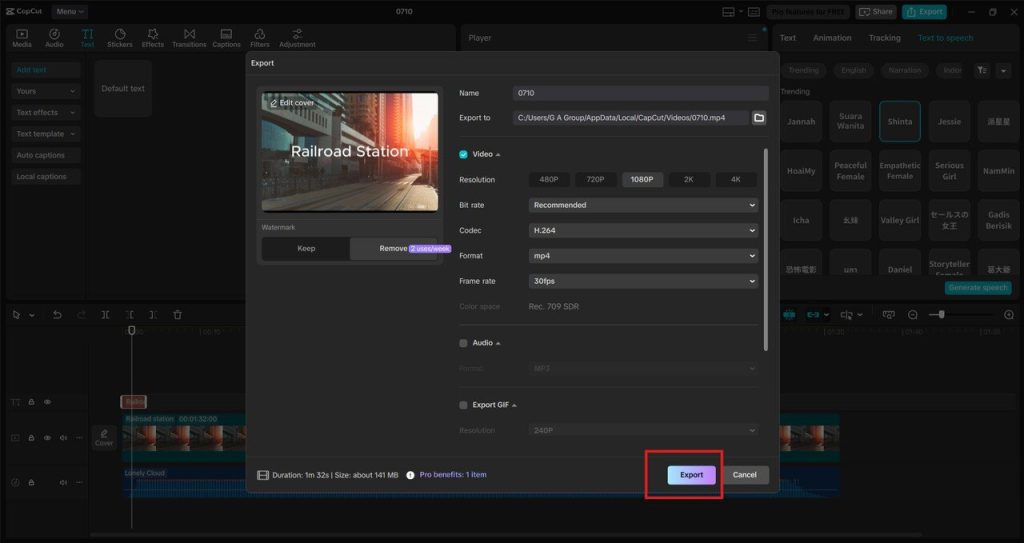
When you’re happy with the result, export your project in HD or 4K, depending on your school’s requirements. Upload it to Google Drive, YouTube, or play it directly from your computer during your presentation. If you’re working remotely or submitting online, include your CapCut project link in your assignment submission.
Real Ideas for School Projects with CapCut AI
Not sure how this fits into your next assignment? Try these ideas:
-
Science: Create an animated video that shows the life cycle of a butterfly or chemical reactions using stock videos, labels, and voiceover.
-
History: Turn your report on the Civil Rights Movement into a documentary-style mini-film with historical images and AI voice narration.
-
English Literature: Animate a scene from a novel or dramatize a poem using CapCut’s voice changer and motion graphics.
-
Math: Explain formulas visually through step-by-step diagrams and transitions. Use slow zoom-ins and arrows to highlight equations.
-
Art and Design: Showcase a virtual portfolio or time-lapse of your artwork using background music and motion transitions.
Conclusion
CapCut’s AI tools let you go beyond traditional school projects and create something that genuinely stands out. With just a bit of planning, you can build professional-level presentation videos that impress both teachers and classmates. Whether you’re camera-shy or not tech-savvy, the AI does the heavy lifting so that you can focus on your ideas. School projects don’t have to be boring. With CapCut, they can be bold, bright, and unforgettable.